When upgrading from version 5.02 or earlier to version 6.01, your previous settings are not retained, and the camera is reset to the default settings.
To retain your previous settings, save them in an All File before upgrading, and then load the saved All File after the upgrade is complete.
Benefits and Improvements
Improves error messages displayed during recording
Fixes an issue where noise may occur in the playback audio after playing multiple clips recorded at 59.94P and 23.98P continuously for an extended period. (The recorded content itself is not affected.)
Improves color reproduction in highly saturated areas
The following benefits and improvements are also included in this update.
Adds a home screen (BIG6) where you can easily review the shooting settings and equipment configurations when shooting movies
Improves the display layout of camera status and settings to enhance visibility during shooting and video playback Note: After updating to Ver. 6.01, you cannot return to the previous display layout.
Allows you to add the following assignable functions to the Assignable Buttons tab:
Crop Select
LUT On/Off
AE Level/Mode
Changes the notation of the 1/50 shutter speed to 1.2F (1/50) when the system frequency is 59.94P
Improves the network configuration method as follows:
Changes the classification of the network menu in the Full Menu
Adds the ability to change network settings on the status screen
Displays an explanatory message when camera operations are disabled due to configuration limitations
Adds support for the Camera ID and Reel Number settings on the status screen
Changes the display when the Camera ID and Reel Number of the next clip are changed
Adds the Index screen to the status screen
Ends support for WPA and WEP. You will no longer be able to select WPA or WEP when connecting to Wi-Fi. Please use the more secure WPA2 or WPA3 moving forward
Adds support for connecting a smartphone to the Internet while it is connected to the camera via Wi-Fi Direct
Adds support for displaying network speed on the shooting screen
Adds support for the following Monitor & Control functions:
Frame rate settings for S&Q Motion
Setting attributes and deleting 3D LUT files
Low-resolution mode for network monitoring Notes:
Ver. 2.5.0 or later of the Monitor & Control app is necessary to access these functions.
The Monitor & Control app may not be available in some countries or regions.
Adds support for a new HLG Mild Base Look preset when the target display is HDR (HLG)
Adds optical density (logarithmic notation) as a display format for the ND filter light transmittance level
Improves the image quality when using a User 3D LUT file
Adds support for importing and exporting scene files from external media
Improves autofocus performance when the system frequency is 29.97, 25, 24, or 23.98
Adds support for the HDMI Focus Magnifier function
Adds support for external recording of Blackmagic RAW when using RAW video output via HDMI
We recommend checking with Blackmagic Design for information about corresponding Blackmagic Design products
Improves the operational stability of the camera
Fixes an issue where, after updating the system software to Ver. 5.00, the audio from CH2 changes unintentionally when the camera is turned ON while the INPUT2 (audio input 2) switch is set to LINE
Adds support for the new 709tone Base Look preset
Adds a 1.5x De-Squeeze setting for both the viewfinder and HDMI output
Adds support for the Monitor & Control app, including:
Waveform and histogram displays
False-color and Focus Map displays
Monitoring at a resolution of 1024 x 576
Note: Please update the Monitor & Control app to the latest version (Ver. 2.0 or later) to continue using this feature after the update.
Adds support for the Area Indication setting when using the Multi Matrix correction feature
Improves the image quality when using 3D LUT software
Adds 23.98PsF (progressive segmented frame) support for SDI output
Adds support for the SEL100400GM and SEL200600G lenses when using the Breathing Compensation function
Adds the ability to use the multi-selector to choose the focus target for the real-time tracking autofocus feature
Adds the following settings:
Format Media A or B setting on the Media status screen
Wireless LAN, Wired LAN and Modem settings on the Network status screen
Improves the adjustment range of the Matrix/Multi Matrix settings when Base Look is set to any value from User1 to User16, and when Target Display is set to HDR (HLG) Note: The effect of these setting values differs from that in Ver. 4.0 or earlier. If you are using the Matrix or Multi Matrix settings, please readjust the values as necessary.
Adds support for Movie file names in the Camera ID + Reel# format
Adds a function that displays De-Squeeze (2.0x, 1.3x) in the viewfinder and through the HDMI output
Adds more AF frame rates during Slow & Quick Motion
Adds support for Flexible ISO and Cine EI Quick in shooting mode:
Allows you to record S-Log3 content with the exposure set by adjusting the ISO sensitivity
Allows you to record using a base ISO setting the same as Cine EI, with the base ISO adjusted automatically in conjunction with the EI value
When the shooting mode is set to Flexible ISO, Cine EI, or Cine EI Quick, adds support for saving a 3D LUT file containing the Base Look used during shooting alongside the shooting data to the same memory card
Adds the following enhancements to the C3 Portal cloud service interface:
Support for simple connection using a dedicated mobile application
Support for managing 3D LUT and All files
An automatic upload function for original files
An automatic upload function for a proxy file while recording in chunks
Adds support for original file trim transfer instructions in the Content Browser Mobile app
Adds support for digital outputs from the ECM-B1M and ECM-B10 microphones
Adds support for supplying power to USB Power Delivery-compatible smartphones during USB tethering
Improves operability and operational stability
Adds AI-based Real-time Tracking AF. When Touch Function is set to Tracking AF, you can use Real-time Tracking to track the subject even during manual focus
Adds a bokeh adjustment mode for easier adjustment while minimizing exposure changes
Adds new features that support High Dynamic Range (HDR) and Standard Dynamic Range (SDR) dual production for SR Live
SDR Emulated Preview Display on EVF
SDR Gain Metadata Recording
Adds the Picture Cache Recording function, which is also supported when shooting with S&Q Motion
Adds support for displaying a 4-channel audio level meter on the shooting screen
Adds other useful features
Adds the 100P and 120P options to the Slow & Quick Motion frame rate menu when the codec is set to RAW or RAW & XAVC-I
Fixes an issue where the EI value is not reflected correctly during playback in Cine EI mode
Improves the overall stability of the camera
Note: Refer to the Manual for additional details on all updated functions.
File Info
Name: BODYDATA.DAT
Version: 6.01
Size: 847 081 840 bytes
Release Date: 01-09-2026
Software Update Preparation
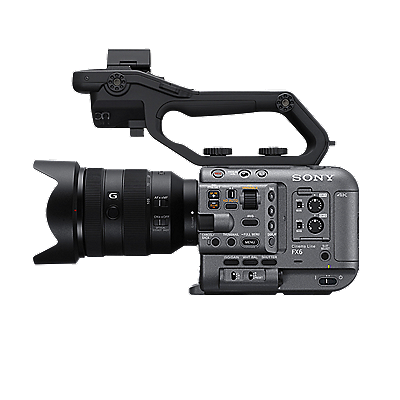
This section explains how to update the ILME-FX6 camera system software.
The software version update data is first saved to an SD card or CFexpress Type A memory card. Note: “CFexpress Type A memory card” is referred to as “CFexpress card(s)” in this document.
The camera is then updated using the screen menu. Note: Refer to the camera's Operating Instructions for details on how to use the menu.
Checking the Current Software Version
Follow the steps below to display the software version of the ILME-FX6:
Select Version.
Select Version Number in the Maintenance menu.
Notes About Updating
When updating the software, always connect the supplied AC adaptor to the camera. If a battery pack is attached at the same time, the update will continue even if the AC adaptor is subsequently disconnected.
Remove any connected devices (such as USB devices, SDI/HDMI cables, microphones, and shoe mount accessories), and eject any media cards that are not necessary for the update.
When using an SD card, use an SDXC memory card.
Use an SDXC or CFexpress card that has been formatted in the memory card slot using the camera's formatting function. Note: Refer to the camera's Operating Instructions for details about the formatting function and supported SDXC/CFexpress cards.
Saving the Software Version Update Data to an SDXC Card or CFexpress Card
Connect the formatted SDXC or CFexpress card to a computer.
Download the software version update data from the download page, then save the data file to your computer.
Save the data file in the root directory of the SDXC or CFexpress card. Do not change the file name.
Updating the System Software Version
Before you start
Do not perform any of the following actions while updating the system software. Doing so could cause the update to fail and the camera to stop working:
Removing or inserting the SDXC or CFexpress card
Turning the camera off
Refer to the camera's Operating Instructions for more information.
How to update the system software version
Insert the SDXC or CFexpress card that contains the saved software version update data into slot B of the camera. Note: Only slot B will recognize the software version update data.
Select Version.
Select Version Up in the Maintenance menu. Note: The Version Up option cannot be selected if the software version update data cannot be found.
Select Execute. Note: After performing this step, a “Please use the AC Adaptor” message will appear.
Select Execute on the software version update confirmation screen. Note: After performing this step, a “Version Update VX.XX > VY.YY” message will appear. (X.XX: current version number; Y.YY: newest version number)
Select Execute on the software version update confirmation screen again.
The software version update starts and the access indicator flashes. The update process takes approximately 8 minutes to complete. However, the time varies depending on the current update version and the new version being installed.
When the software version update is successfully completed, the access indicator will stop flashing, and the unit will restart automatically.
Check that the software version has been updated (refer to the Checking the Current Software Version section of this document for details). Note: If the system software has not been updated to the latest version, check the version update procedure, and then perform the update procedure again from step 1.
IMPORTANT: If you experience an update issue, such as a black screen that persists for 15 minutes or longer, you may need to perform the update again.
Set the camera power switch to OFF, disconnect and reconnect the power cord, and then set the power switch to ON.
Check the software version update procedure, then perform the update procedure again from step 1.
If the issue persists and the update is not successful, there may be a problem with the camera. In this case, please contact a Sony service representative for further assistance.
Please accept Youtube cookies to watch this video
Access your cookie preferences below and make sure to switch on the Youtube cookie under the 'Functional' section.